I love mushrooms. There aren’t many savory dishes that can’t be improved by adding mushrooms. But, it’s the one thing I didn’t have any experience growing myself. The whole process felt a little daunting, so when I saw that Back to the Roots sells mushroom growing kits that include everything you need to grow mushrooms at home, I was definitely interested in giving it a try.
Back to the Roots says you’ll have fully grown mushrooms in 10 days and you can grow two or more crops per kit. Each crop is supposed to be up to half a pound of pearl oyster mushrooms. The most important part of the kit is a block of organic plant-based soil that is infused with mushroom spawn. Basically, all you need to do is add water, keep it moist, and then expect a delicious oyster mushroom harvest in a little more than a week. We decided to put the kit to the test.
This review is not sponsored. We purchased our kit at full price from Amazon. This article does include affiliate links, but the review reflects our honest opinions.
Check out our video review to see the kit in action and our results, then read my full review below.
Organic Mushroom Farm Review
Setting Up the Mushroom Farm
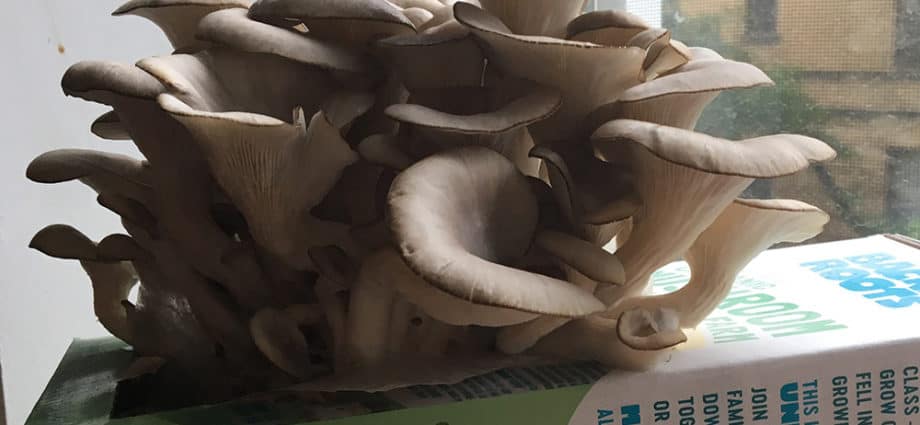
Setting up the kit was extremely easy, the box includes almost everything you need to get started:
- The Box
- Substrate Brick + Mushroom Spores
- Spray Bottle
- Instructions
- Cherry Tomato Seeds (bonus gift)
In addition to the kit, you’ll also need a large bowl or container to soak the mushroom substrate in and a knife or scissors.
Everything included in the kit seems great (we haven’t tried to tomato seeds yet), but the spray bottle is a little laughable since it is so small. We ended up using a regular generic spray bottle that we use for seed starting.
The instructions were very easy to follow. We used a pair of kitchen shears to cut an X into the bag, then scratched the white layer with a fork. Then we soaked the substrate brick with the X side down in a bowl for a little more than six hours.
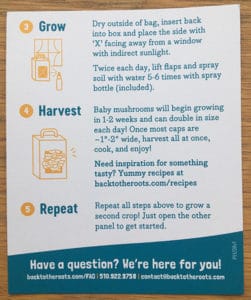
After that, we dried off the plastic and returned it to the cardboard box. We placed it in a north facing window that does not get sunlight, with the open side facing away.
The first thing we noticed was that excess water was dripping down and making the box soggy. We put the farm on a plate to catch the excess water. I’m not sure how to avoid this without ditching the box entirely, but it seems to be important to prevent the substrate from drying out. Eventually, we ended up resting the box on its back (still on the plate) to keep the water in the plastic. We also put it on the counter near the window to avoid direct sunlight.
We decided to spray the farm 3-4 times a day (instead of the recommended 2x) because the farm seemed to dry so quickly. That technique worked just fine because we saw our first mushroom growth on day 4:
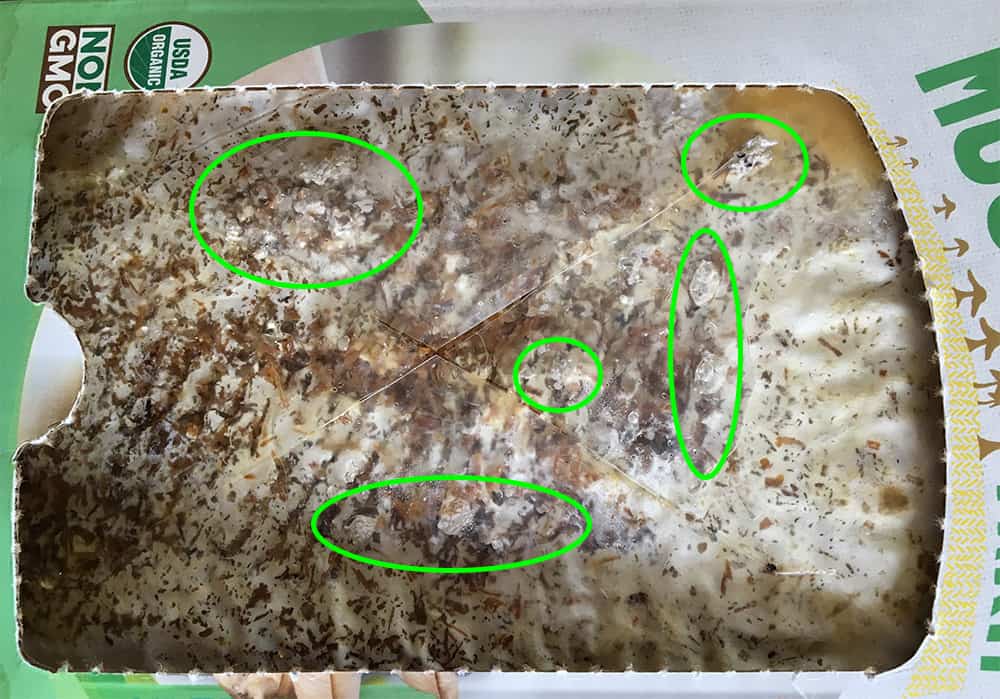
It’s difficult to see in the photo, but I would describe them as clusters of white bumps.
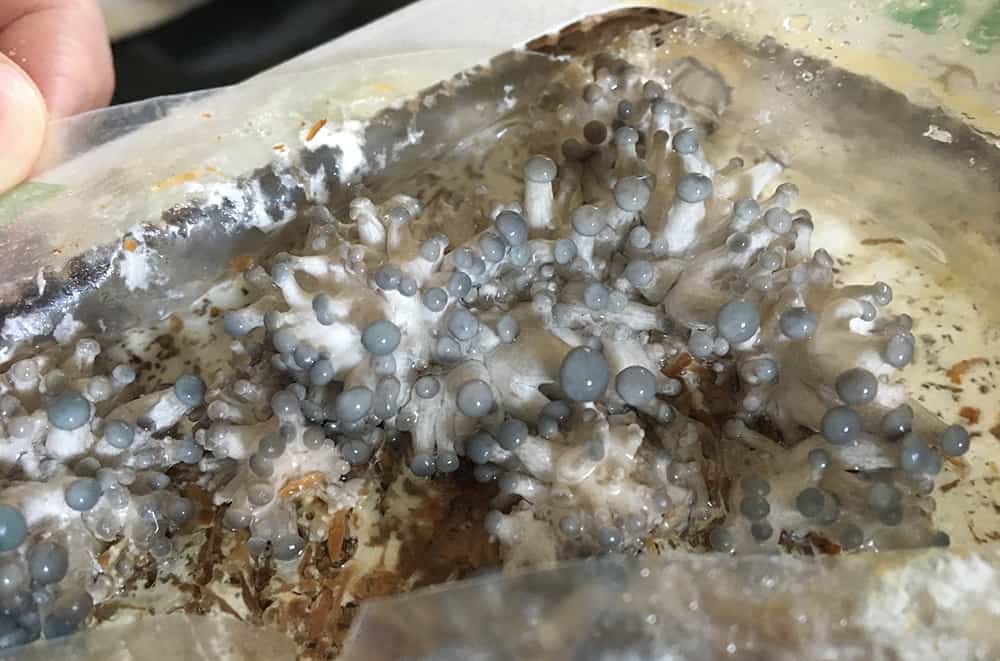
Over the next 24 hours, it felt like the mushrooms exploded in growth and that the farm would live up to their 10 day harvest claims.
Day 5:
Day 6:
Day 7:
Day 8:
One thing to note: on days 7 and 8 the mushrooms started releasing spores, which left a white sticky dust on our counters. It wasn’t a big deal because it was easy to clean up with a wet rag, but keep that in mind when you’re choosing a location for your mushroom farm.
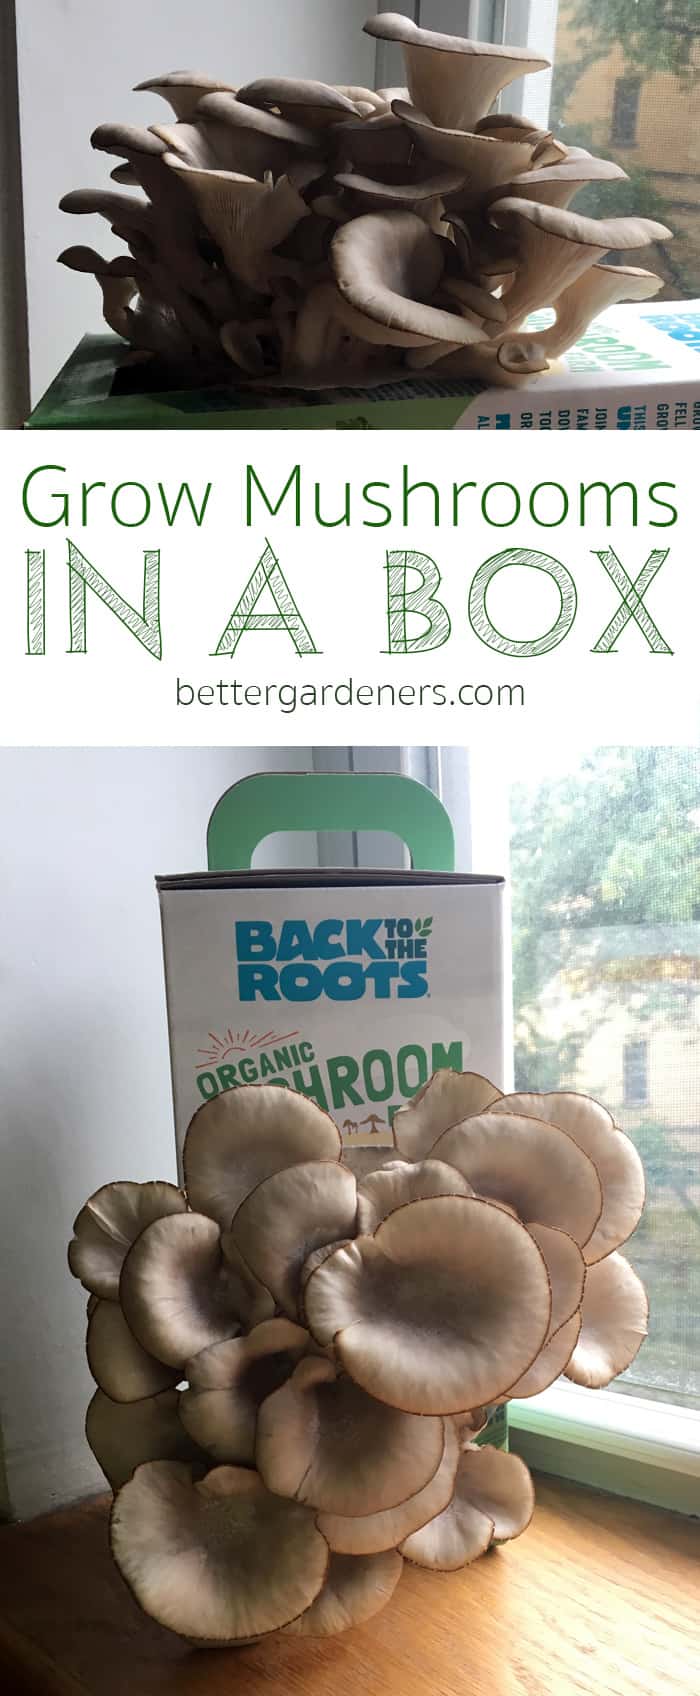
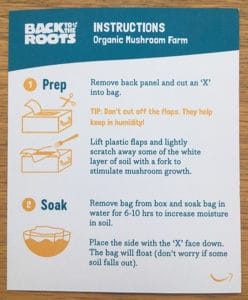
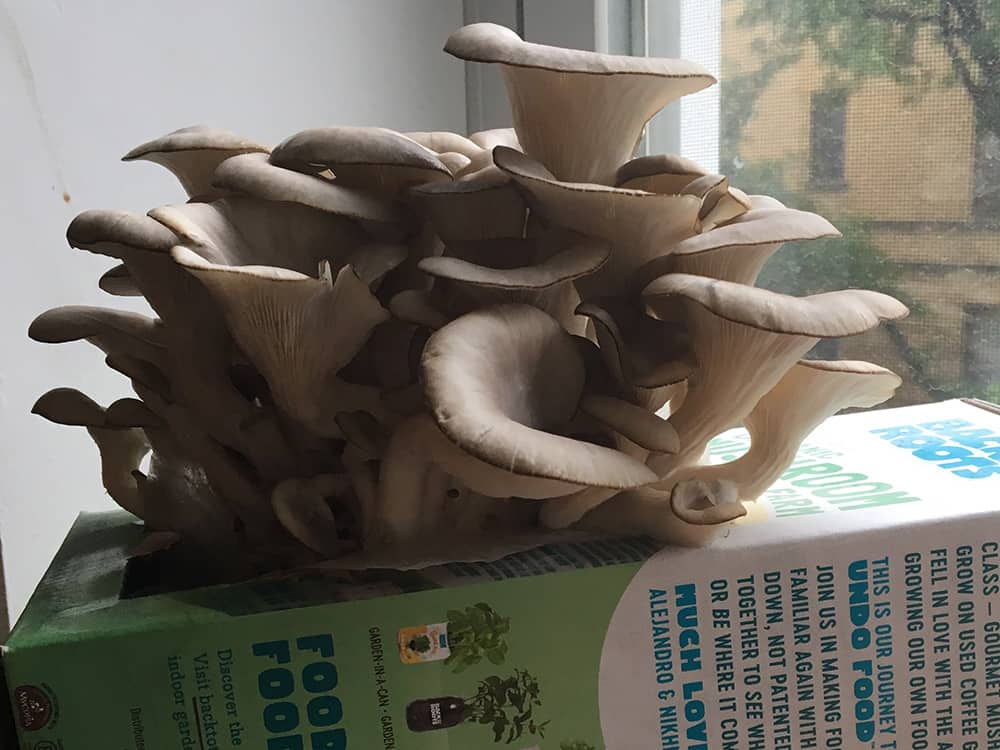
Results
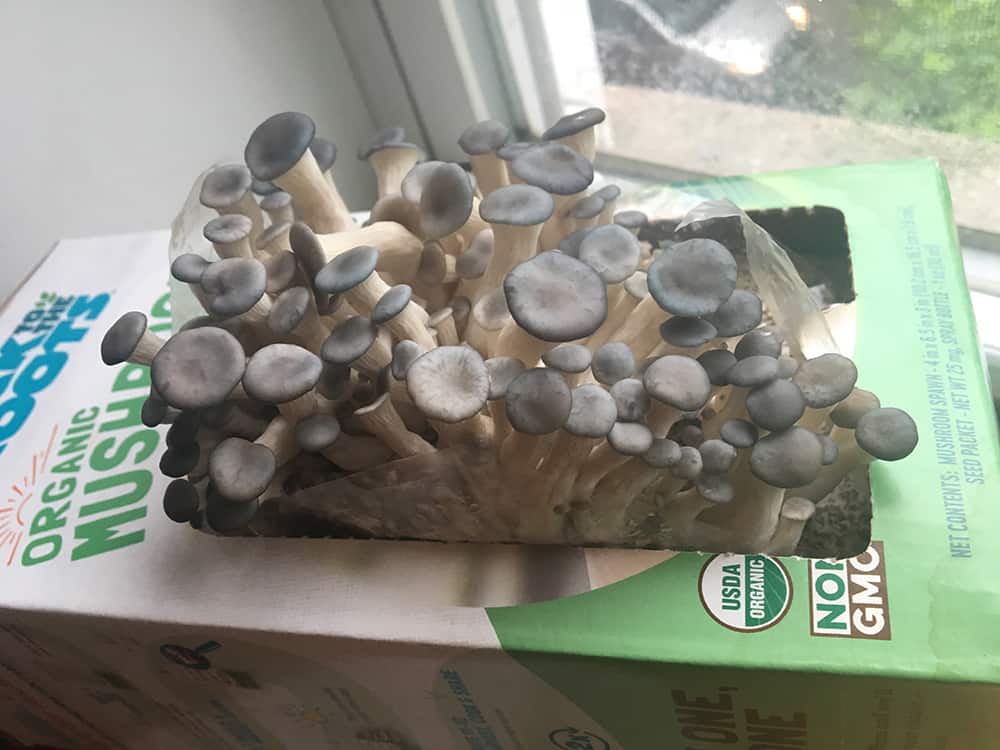
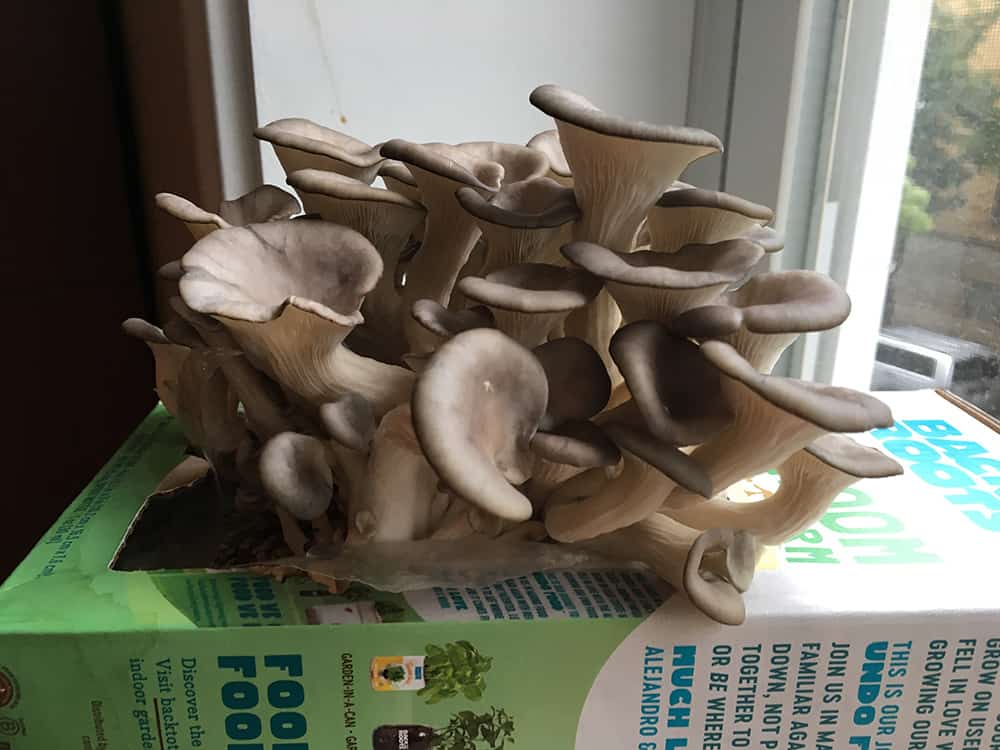
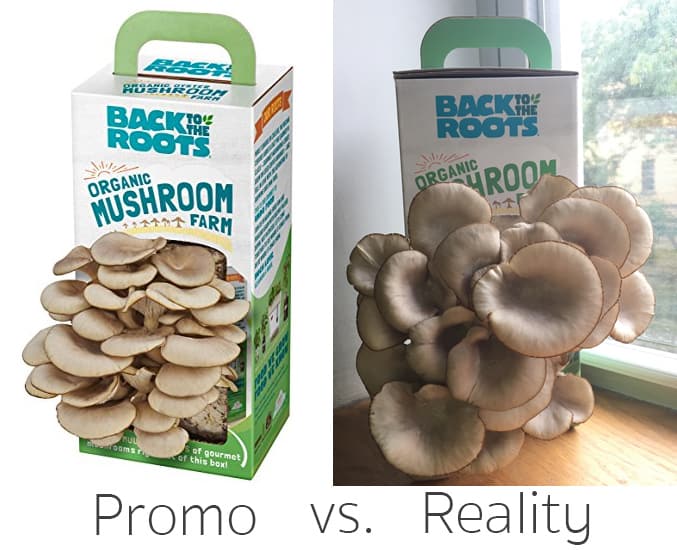
Our oyster mushrooms were ready to harvest on day 8, which was completely within the forecasted 7-10 days. We were really pleased with the first harvest, the box lived up to all the claims. It was very easy to grow and once the mushrooms started growing the whole process went very fast.
The manufacturer said it should produce half a pound of mushrooms. We plopped our first harvest on the scale and it was 6.6 oz. (about 0.4 lbs), so it was under the amount they promised, but we were really pleased with the mushrooms we got.
Final Thoughts
This kit is a lot of fun for foodies who like to cook and gardeners who want to try something new. This is also a fantastic project to do with kids, the instructions are easy to follow and your children will probably enjoy spraying the “farm” each day. You don’t have to learn the nitty-gritty of mushroom farming to use it, but the kit could be paired with educational content if you want. I think it’s also a great gift idea for gardeners and people who love to cook.
Whether it’s worth the price tag of the kit will be determined by how many harvests we can get out of it. The low effort certainly means it’s not a time sink. This is also a great way to grow fresh food if you live in an apartment or other urban setting without a traditional garden. Plus, you can grow these oyster mushrooms in any season. We give the kit a hearty thumbs up!
Save on Pinterest